Thursday 23 August 2012

HEATWAVE! Enter: Banana, Coconut, Honey Frozen Yoghurt

Last weekend in London marked the start of a heatwave, you know, one of those horrible city heatwaves where it feels like pollution is crawling in through every open pore and you're so hot you could fling yourself in Regent's Canal and you probably would but you live in Camden and you know what goes into that canal and it's not pretty.

Yes, it was hot. 32.4 degrees C in some parts of the country on Saturday. And I wanted frozen yoghurt. So I went to the supermarket and discovered on the discount rack, a neglected pile of bananas for the low low price of 25p.


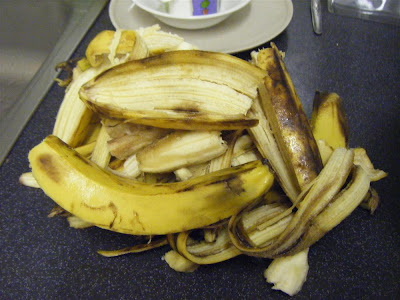
I'm not sure how many it was exactly, but I think it was 4 bunches. I peeled them...


...discarded all the gross bits...


...and mashed them up with a potato masher.


To this I added half a tub of yoghurt (250g) and a big spoonful of honey.


This stuff is creamed coconut, I found it in the world food aisles, by a bunch of Caribbean foods. It came in plastic in a cardboard box and had separated into a ridiculously solid lump and some goo. So I smacked it round the kitchen a bit and then shoved it in a bowl and tried to break it up, with limited results (the giant frozen lumps of coconut were pretty tasty, but I wouldn't want to give it to guests like that).


Chopped up some chocolate to make chocolate chips and it was so hot that the chocolate started fusing together.


And here's what my mixture looked like at this point:


And now comes the magical freezing bit. Well, it would have, if I'd had any money left over for ice and heavy duty zip lock bags. You see, the best way to make ice cream/frozen yoghurt at home is this:

  1. Put mixture in heavy duty ziplock bag and seal securely
  2. Fill a larger heavy duty ziplock bag with ice cubes and salt, put the first ziplock bag and seal the second one securely.
  3. Put on gloves, gentle rock bag back and forth for 15 minutes, or until inner bag mix has solidified. If you're at a party, you can pass it round when you get tired!
  4. Open ice bag, remove mix bag, eat out of mix bag.
And the second best method is this:
  1. Put mixture in a metal mixing bowl
  2. Fill a larger bowl (or washing up tub) with ice and salt, make a depression in the middle of the ice, slot in the metal bowl
  3. Stir the mix, being careful not to get any salty ice in it! If you are dyspraxic and know you will get salty ice in there, go for a flavour that goes well with salt, like caramel or chocolate.
The crappy method I had to do? You put the bowl in the freezer and stir it every couple of hours until it fully freezes. Only I made my mix at 1am, so I had to set an alarm at 4am so I could get up to stir fro-yo. I guess I could have made it go faster by pouring it out into a metal baking tray but I didn't feel like doing more washing up.

Here's what it looked like at the first stirring:


And here's the finish product:


The change in colour is due to the oxidisation of the bananas. You'll need to wait about 10 minutes before you can dig in when you go to eat the fro-yo if you do it with the freezer method, but there you go! The total cost of this was, I think, about £1.80 (Sainsbury's basic yoghurt 55p/2 = 23p, bananas 25p, creamed coconut £1.20, honey about 10p's worth) and I got a lot for my money. Plus now I know I can make frozen desserts.

Global warming? More like cooking opportunity.

Saturday 18 August 2012

Chunky Daal and Pauper's Pan Bread

What that, daddy-o? You're poor? Like really poor? Like wonga loan poor? Me too. Well let's throw on some Jazz Fm, grab that bottle of micro-brewed IPA you got free from work, and get used to eatin' cheap. Today's menu? Lentils and bread.


For the daal you will need:

  • big yellow lentils. This kind:


         I keep in them in a tub so I don't have the packet, but I think these are chana dal, a.k.a             yellow split peas. You'll need about a scoop and a half. When I say a scoop, I mean 100ml, which is the largest cup on the IKEA set of measuring cups I use. When I say "teaspoon" I mean just a bog standard cutlery teaspoon. Other measurements are other scoops in the scoop set.
  • Onion. I used 2 small spring onions, but you could use a shallot or about a quarter of a standard white or red onion, I guess.
  • Sesame seeds. I get them cheap from Chinatown, but sometimes supermarkets stock them in the whole foods section. Use about 15ml (a tablespoon full) of these.
  • Garlic. About 2 large cloves.
  • Oil or ghee or butter. I used a sesame/vegetable oil blend infused with garlic. 
  • Curry paste. I used 1 big teaspoon dollop of this stuff:
  • Chilli flakes. 1/2 a teaspoon to 1 teaspoon depending on how you like your spice.
Okay poor people, let's cook!
  • Put your lentils in a sieve and give them a vigorous wash under running water. Pick out any blackened lentils, small stones, or (in my case) large chunks of wood. Put your lentils in a pan of water and boil for 10 minutes. Drain your lentils, rinse and leave in the sieve.
  • Pour enough oil into your pan to cover the bottom in a thin layer, and heat on low. Chop up your garlic and onion, fry, add the curry paste, chilli flakes, and sesame seeds and cook until your onion starts to soften.
  • Add the lentils, give everything a good stir and cook on medium heat for about five minutes.
  • Add a scoop of water and simmer until it's the consistency you want. Some people like their daal more soupy, I like mine quite pulpy with only a little bit of liquid.
Now you can stop here if you want, but I like mine with bread to dip into the lentils and sweep up the side of the bowl. You could, of course, use store bought naan bread or chapatis, but we're poor, remember? So:
  • Take 1 scoop of white bread flour, a pinch of salt, 5ml of baking powder, 15ml of oil, and combine it bit by bit with about 40ml of water until you have a flexible dough. You can add cumin or coriander seeds if you have them, but I ain't fancy enough fo' that.

  • Heat up a little oil in a frying pan, stretch out your dough into a patty (you can use a rolling pin for this but I just used the heel of my hand), and gently lower it into the hot oil. You want the pan on a medium heat so that the dough has time to activate the baking powder and puff up.

  • When your dough gets a good amount of dark brown spots on the underside, flip it and cook the other side. You may need a little more oil.
  • Serve it up! Daal in a bowl, bread on the side. Watch out though, the bread stays really hot on the outside for long time.

And that's it really. Serves one hungry hungry hobo as a stand alone dish, two if served with rice and/or vegetable curry.

Of course, if I'd gone for a walk instead of staying in to cook, I would have noticed that Dirty Burger down the road from me were giving out free burgers from 1-2pm. DAMMIT.

Friday 17 August 2012

Life Drawing Review- Art Macabre at Cass Art

I love Cass Art. There I said it. For those of you who don't know, Cass Art is a chain of art supply shops in London, famous for their insane student sales. Their megastore is in Islington, opposite a joint where you can grab a pretty awesome burger called The Cuban, and comprises of 3 floors of amazing art goodies. Up on the top floor is paper, canvases, portfolios, and as I found out recently, occasionally naked people.

Art Macabre combine life drawing with what I guess you could call "amateur theatrics". It's pretty good fun, and very good value at £8 for 2 hours with several models and poses and materials included. Everyone huddles downstairs before the top floor officially opens and then there's a bum rush for materials and seats. I recommend you go and secure a good seat first- you can always draw with the wrong colour pencil, but if you're short and you end up at the back you'll spend the whole class with a crick in your neck trying to lean round the person in front.

This week's theme was Revenge of the Rejected Toys. In the centre of the room the stage was set with all sorts of kitsch bits and bobs: plastic deer, cutesy paintings of children, and various dolls. We had 5 models plus the MC to provide inspiration for the evening.

First up was the nurse and the broken toy soldier:
(yeah, I'm a bit rusty. I have been doing my daily drawings, but I haven't drawn from a proper model for ages)
Here's another toy soldier drawing, plus the introduction of the pregnant doll:
It was nice to work with charcoal, I used to love it but I haven't used any for ages. And here's where things start to get weird. Miss Doll "gave birth" to a bear, and then tried to breastfeed it before getting angry and rejecting him. There's a sentence I never thought I'd type.

Angry doll (far right) was my favourite pose of the evening. The figures in pen here are the bear (all grown up) and the last model we got, the marionette puppet. My bear looked more like some kind of grotesque ghouly thing but never mind.

So do I recommend Art Macabre? Yes, absolutely! It was a very fun evening. Here's a run down of my tips if you decide to go:
  • bag a good seat first
  • eat before you go! Islington has tons of great restaurants
  • take a drink with you. It's 2 hours long and towards the end I was starting to droop a little
  • be prepared for some weird situations, and don't even think about taking the session seriously
  • don't worry about your level of drawing skill, or the level of skill of the other people in your class. This is not school, there are no grades or marking criteria. Just relax, and draw. People will peep at your pictures though! PEEP RIGHT BACK.
White Rabbit bar in Stoke Newington  do life painting sessions, so I think I might go along to one of those next. I tried painting the other day and discovered how badly out of practice I am. It's embarrassing really. Well, you can't be a master at everything at once.

...or can you?

Friday 10 August 2012

So I started an art gallery on a whim

I am the self proclaimed baroness of whims, to the point where I applied to go to university on one. Seriously.

As such, I have decided to start up a travelling art gallery. Hopping from flea market to pop-up across the capital, hawking my friends' art for a low low commission of just 15%. I mean, how hard can it be really? People start up businesses all the time, and mine doesn't involve food so there's no chance of murdering people with explosive diarrhoea. 

My gallery name? Gallery Flea.

I've found some pretty cool spots, got my system sorted, got some artists lined up, ordered some packing tubes, and I'm pretty much ready to go.

To do:
-sort out a logo and cover photo for my facebook page
-make some flyers that I can hand out on my stall so people know who we are
-get more artists on board
-buy some paper bags (printed with logo?)
-source merchandise (a shirt for me to wear on the stall, tote bags?)
-advertise with locale specific internet ads
-have a banner made for the front of my stall
-buy a fold out table for events which don't have tables

It's all a bit overwhelming, but I really want to make this work! And like I said, people do start up businesses all the time and increasingly people are turning their pop-ups into permanent enterprises. Ask any Londoner about Pitt Cue Co. or Meatliquor and you'll see exactly what I mean!

Monday 6 August 2012

Finished! I never want to sew denim again.

Way waaay back, a whole year a little bit back, I started making a quilt from old pairs of jeans. Remember? Well it had been fully pieced and shoved on a shelf in my parents' front room since then, waiting for someone to come along and give it some lovin'. This weekend I finally got round to finishing it to a usable state.


Here it is on my double bed in my new flat. I haven't measured it so I don't know what size it is, but I did sleep under its heavy embrace last night and it was surprisingly warm and comfortable. There is no batting, just a polyester fleece blanket for the back.

I am happy with how it's turned out. These photos are crap because they were taken under energy saving bulbs, but you can see the gradient of denims I was trying to achieve. It almost looks like light hitting water, especially with those weird bleached/lightning pattern blocks. I was going to quilt the top, possibly with a ripple effect from the middle, or rays, or horizontal wavy lines, but I decided the most important thing was to get it functional and then go from there.


Denim is such a bitch to bind with though. I should have chosen a lighter-weight material to finish the edges with. In the process of binding this thing, I broke 2 needles! The seams in places were just too bulky to sew over with a home machine, so in places I had to stop and restart. Some of this may need further work done by hand to secure it. The edges are also not as neat as I would like them in places, just because the machine and the material were wrestling each other.


There you can see me stopping and starting the seams. I need to trim some threads.

I can honestly say that I never want to sew with denim like that again. I was working with thick, strong material, mostly from men's jeans, not the lightweight, flexible stuff you can buy from a fabric shop. I don't see more denim quilting in my future, that's for sure! At least not with proper patchwork. If I worked a design using appliqué denim zig-zagged onto calico then it might work.

I'd have to wait a fair few years to get that many jeans again though!