Earlier this week I made my first ever large head sculpture, following along with a how to sculpt faces book. For a first attempt it was okay, but I wasn't happy, partly because it looked just like a smaller head I'd made in porcelain the day before and I was starting to worry that maybe this was the only face in the world I could sculpt.

So yesterday, over the course of 5 hours, I tried again. The material is just the standard buff clay that we have in the workshop, nothing fancy. Here is a basic step by step of how to make a character bust. The most fun in this project clearly comes from seeing how many styles of headdress you can make from a j-cloth, as you will see.
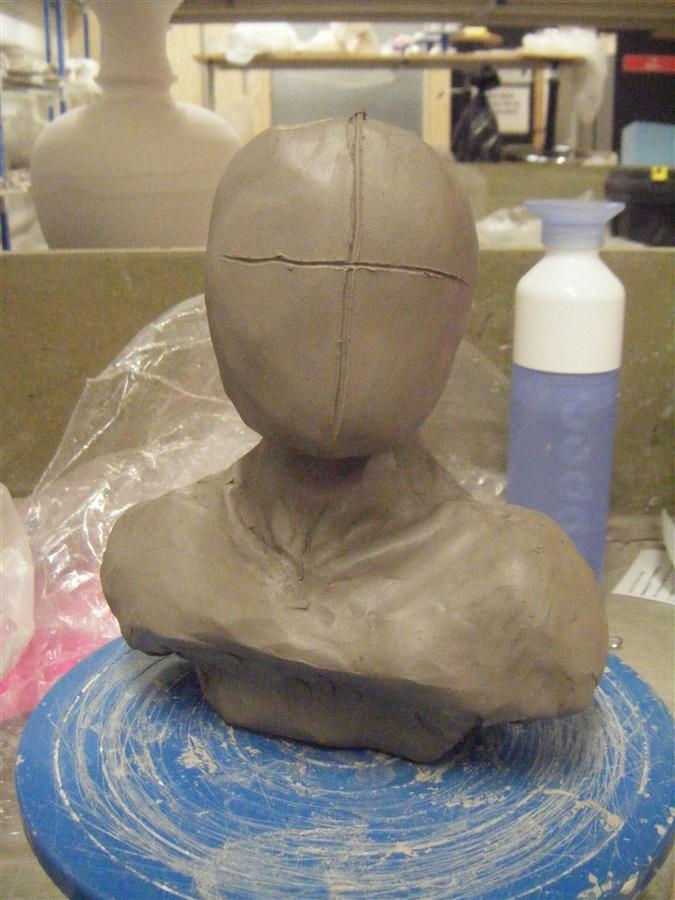
Start by modelling the shape of the bust and neck, paying attention to details like collar bones and trapezius muscles.

Gouge out indents with your thumbs for eye sockets, then add blobs of clay for mouth and nose.
 Add small coils of clay for brows and cheek bones. Blend the cheek bones in well. This photo shows the left cheekbone before blending.

Sculpt in the detail on the nose and then the mouth.

Add blobs of clay for eyes, blend in.


Open up the eyes with a tool, dragging the clay up to form an upper lid...
...then add small blobs of clay and blend to reform the curve of the eye.

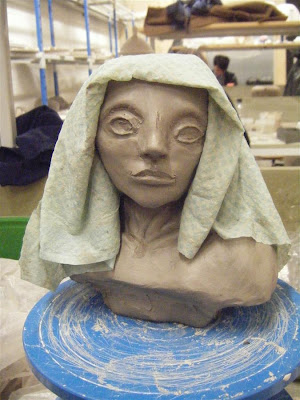
Okay, so the face is looking pretty good right now:


But because I don't want to make a plaster copy or mould of this piece, I just want to fire it, I need to hollow her out so she dries more evenly and doesn't blow to smithereens in the kiln. It's possible to hollow out the bottom of the bust by carefully tilting the piece up, but you can't get inside the head this way. So it's lobotomy time!


Go to town with a loop tool, reciting the phrase "Chilled monkey brains" as you do.

Reattach, and it's like it never happened. Let's get working on the hair. Coils can be attached around the scalp to form the hair line, and then flat pieces of clay added for any hair that lies flat on the scalp. At this point I noticed her head was drooping a bit and compressing the neck, so I tried to support it with a blob of clay under the chin. Plaits and hair tendrils can be made from coils, but they will be extremely delicate.


She's looking a little plain, so let's add some details to tell us a little more about her character, like a circlet and the edge of her dress.


Give your character a name- this gal is Cassandra- and she's done:


So yesterday, over the course of 5 hours, I tried again. The material is just the standard buff clay that we have in the workshop, nothing fancy. Here is a basic step by step of how to make a character bust. The most fun in this project clearly comes from seeing how many styles of headdress you can make from a j-cloth, as you will see.
Start by modelling the shape of the bust and neck, paying attention to details like collar bones and trapezius muscles.
Gouge out indents with your thumbs for eye sockets, then add blobs of clay for mouth and nose.


Sculpt in the detail on the nose and then the mouth.

Add blobs of clay for eyes, blend in.


Open up the eyes with a tool, dragging the clay up to form an upper lid...

...then add small blobs of clay and blend to reform the curve of the eye.

Okay, so the face is looking pretty good right now:


But because I don't want to make a plaster copy or mould of this piece, I just want to fire it, I need to hollow her out so she dries more evenly and doesn't blow to smithereens in the kiln. It's possible to hollow out the bottom of the bust by carefully tilting the piece up, but you can't get inside the head this way. So it's lobotomy time!


Go to town with a loop tool, reciting the phrase "Chilled monkey brains" as you do.

Reattach, and it's like it never happened. Let's get working on the hair. Coils can be attached around the scalp to form the hair line, and then flat pieces of clay added for any hair that lies flat on the scalp. At this point I noticed her head was drooping a bit and compressing the neck, so I tried to support it with a blob of clay under the chin. Plaits and hair tendrils can be made from coils, but they will be extremely delicate.


She's looking a little plain, so let's add some details to tell us a little more about her character, like a circlet and the edge of her dress.


.JPG)


