Monday 25 April 2011

I haven't been slacking, I promise!

I have been doing stuff. Just not updating my blog. Because I'm terrible at it.


With my mum and brother, I potted up some succulents for outside the front door:


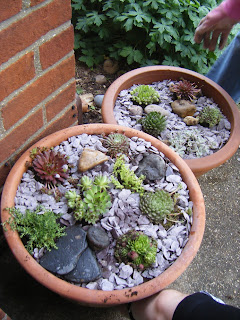
 Pretty, huh? The slate goes purple in the rain so they look really cool in all weathers.


I also made a raised bed for the garden because one of my vegetable beds is underneath an oak tree so it's difficult to dig with all the roots.


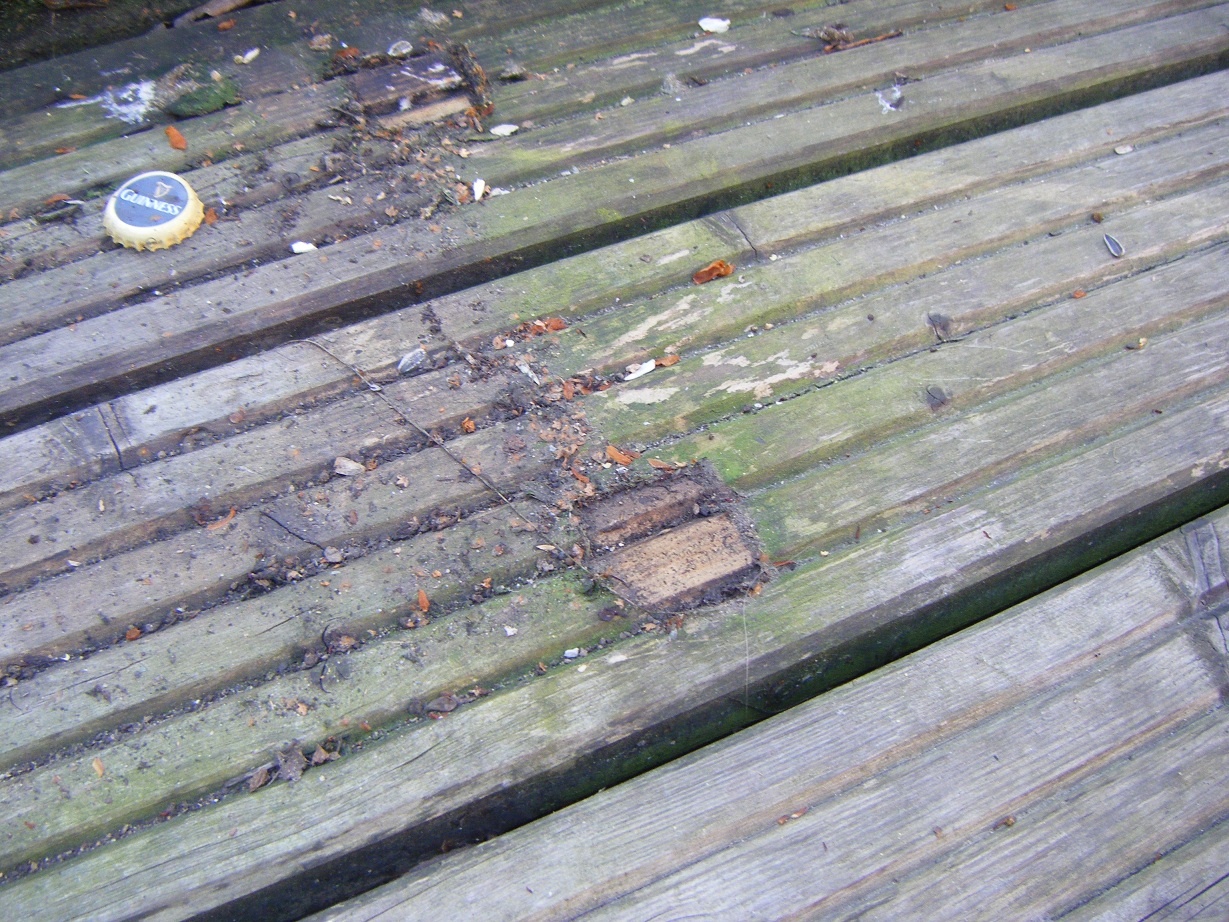
 Don't laugh! I'm awful at woodwork, I know. I want to get better. Need to take evening classes or just practice lots, I guess.


I also cleaned up some skulls, but I've only got photos of them before. They were deer skulls, one adult female and one juvenile.


And lastly, Friday was good Friday. So I made execution bread:
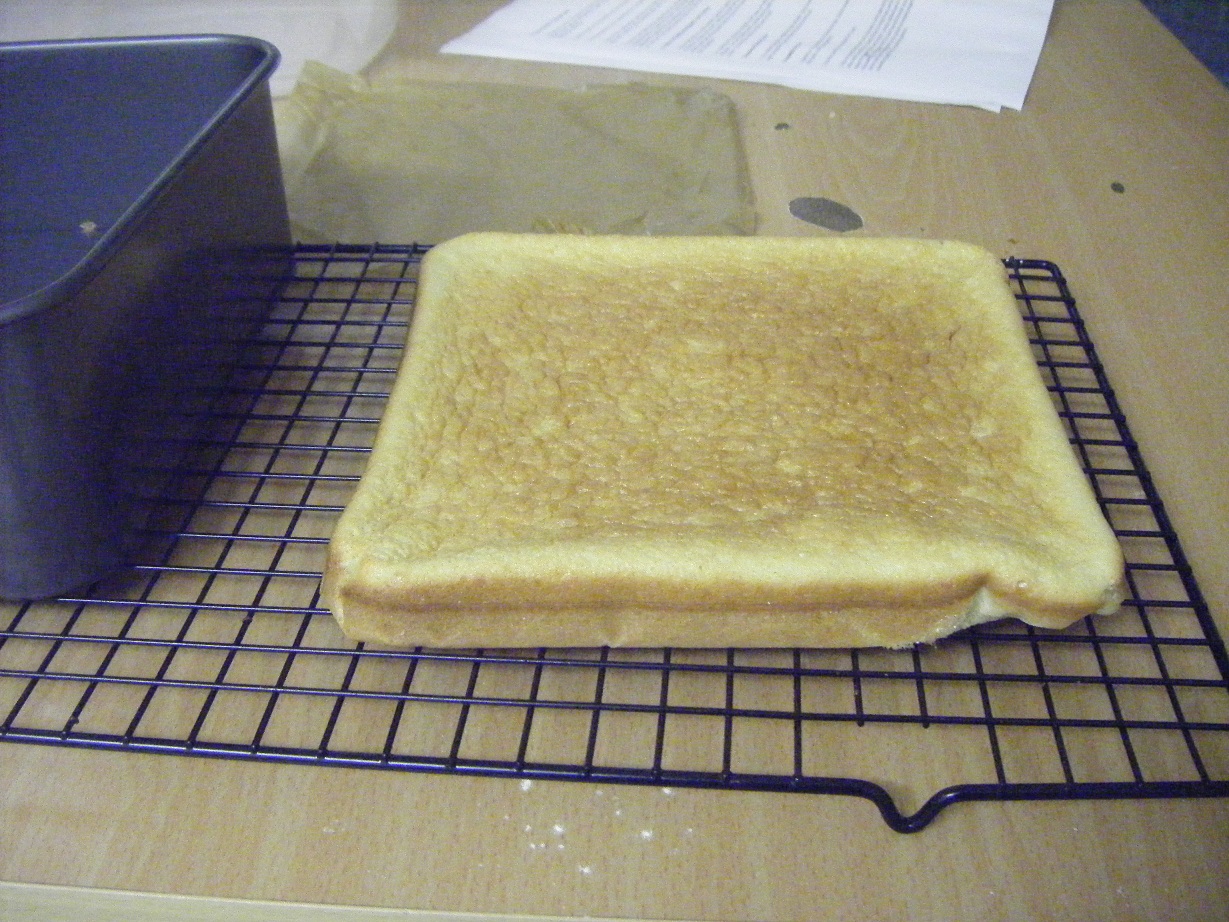
It was delicious, a mix of strong white bread flour, coconut, honey, oatmeal, yeast and chocolate chips, glazed with a milk and honey mix. I'll post the recipe if I make it again, I have a habit of measuring things in handfuls and dashes.


What the hell do I label this post as?

Sunday 17 April 2011

How to reverse appliqué

Appliqué is the act of cutting out something in fabric and sewing it onto a fabric background. Reverse appliqué involves creating a sandwich of fabric layers and then cutting through them to reveal the fabric underneath. It's like the difference between wearing your underpants over your trousers and wearing two pairs of trousers but cutting an underpants shaped hole out of the top one. With me so far?


I like reverse appliqué better than the regular stuff because in general it's more stable- with appliqué you're trying to hold down a fiddly bit of fabric while you sew it in place. Reverse appliqué also creates a thick hardwearing piece of fabric sandwich, which is a great surface for quilts, bags and cushion covers. Here's how to do it.


You will need:

  • 2 or more layers of fabric. For your first project, 2 is easiest. The best fabric to work with from experience is medium weight cotton/poly-cotton because it's thin enough to make it easy to cut but doesn't stretch or slip out of place. Felt is another good choice because it doesn't fray.
  • a seam ripper
  • sharp scissors
  • a sewing machine that has an adjustable zig-zag stitch.


Assemble your sandwich using two similar sized pieces of fabric. The bottom fabric can be slightly smaller than the top layer, but you don't want too much of a difference because it makes life difficult. Mark out your design using tailors chalk or water soluble marker and then tack a grid across your design. The grid of stitches holds the whole sandwich in place and prevents the layers from moving independently. 
Set your sewing machine to a loose zig-zag and carefully round your design. Start from as close to the middle as you can and work your way out. Here I started on the left side of the S, completed the S and then worked the I starting from the right side.


Now take a seam ripper (un-picker, mean pointy thing) and carefully poke a hole through the top fabric layer. Be very careful not to damage the lower layer. You want to create a tear large enough to get the point of your scissors into.


Now take your scissors- small and sharp ones are best, such as hairdressing or embroidery scissors- and start to cut round the inside of the stitching as close as you can get to the stitches.


After that, you should have something that looks like this:


You can leave the design like this if you have chosen a non-fraying fabric like felt, or if you feel it looks neat enough. I'm going to neaten up the edges, so for this you need to set your sewing machine to a satin stitch or a tighter zig-zag stitch and work your way round the exposed raw edge.


This is my finished piece. It puckered a little (doesn't look as bad in real life) because the design I chose was very curved and I rushed the satin stitch stage. And also because I'm just a bit out of practice.


Here's a few more I've done recently:
As you can see, I'm not a typographer. Letters are really not my strong suit.


A few years ago I made this bitching union jack flag cushion cover using the same technique though. Straight lines are much muuuuuch easier than curves.


Reverse appliqué is a bit wasteful really because of all the layers you cut away, but you can always appliqué the cut aways onto something else.


And well, that's it really. You can use as many layers as you want as long as you plan your design out. The most I've used was four because after that it gets more and more difficult to neatly cut through the layers. The finished pieces look good in art quilts or wall hangings.


Good luck! x

Friday 15 April 2011

I hate squirrels


Come on, you fat little arseholes, there's a ton of food out on the bird table that you have no problem demolishing your way through every day. Why you gotta turn on my sunflower seeds and trash them, chew the bottom off three pots and, on top of that, dirty my lovely deck?

This is why I need a dog.

Or a gun.

Japanese style sponge cake- defeated!

A month ago, I got weirdly obsessed with making a Japanese sponge cake. I don't know why. Maybe I was just sick of making my run of the mill throw it all together sponge cake and wanted more of a challenge. A Japanese sponge cake is eaten with strawberries and cream and sometimes known as Japanese Strawberry Shortcake or even Christmas cake.

Well, the one I tried to make in my shitty student halls kitchen back in London was a disaster. I ended up bashing all the air out of it, probably undercooked it in my godawful oven (the door is opaque so you can't watch food, which isn't great for cakes) and ended up with something that resembled a piece of toast and tasted like a very thick pancake.


This was the night before someone's birthday, which I promised I'd be making cake for. The next day, I rushed out at 9 in the morning to buy eggs, and put together a normal sponge cake, decorated with whipped cream and strawberries.


It looked and tasted delicious, but it wasn't the Japanese style sponge.

I like finding and defeating challenges. It makes me happy to know that there are problems in life that you can conquer. Cake is a very good problem to work out too! Tonight, noticing my mum had way too many eggs sitting on the side, I brought up Cooking With Dog and had a cook along. I followed everything to the letter with one exception- I swapped out 15g of the flour for 15g of cocoa powder.

Oh, and I swapped strawberries for raspberries. The strawberries at my local were rank, each pack seemed to be half rotting and half unripe. Bleh. I can't wait for Berkshire strawberry season (only a few more weeks, I reckon!)

I also skipped the Kirsch but added a little vanilla essence to the syrup mix.


...and I added a tablespoon each of Nesquick powder and cocoa powder to the cream topping. So four changes rather than one. I can't help it, I'm a natural born meddler.


The sponge was unbelievably light and airy but completely avoided being dry or crumbling. I was surprised when I first took it out of the oven and didn't quite trust that it had cooked through because it felt so moist. The air gives it a wonderful springy quality.


It is messy and difficult to serve, definitely a fork cake. It also disappeared faster than I've seen any cake go in our household, the airy quality makes it so moreish because it's just so far away from being sickly.

I think this is a fantastic spring cake- the fresh cream makes it unsuitable for summer and the fact it's cooled makes it not the best for winter (I like hot puddings on cold nights). Around this time of year, berries are starting to get affordable again. I would love to try this cake in miniature or cupcake form with a sprinkling of blueberries on top.

Maybe there's more experimenting on the table...

Thursday 14 April 2011

What to do with old clothes?

Someone told me the other day that their flatmate simply throws clothes away when he doesn't like them any more. As someone who hates waste, this really shocked me. Who the hell just throws clothes away? Textiles are a valuable resource that take a huge amount of land, water, labour and horrible toxic chemicals to produce. To throw them away when you're finished with them is a further slap in the face for the people who make them. According to one source, each year 1.2 million tonnes of textile waste generated in the UK ends up in landfill.


That's disgusting. But what should you do with old clothes? Well my handy insomnia produced this flowchart using free online software from Gliffy!

Even if your item is in good condition, chances are you won't get much money for it, unless it's  a designer piece and you still have proof that it's not a knock off. The best thing you can do is to donate the clothing to a charity shop. This gets good quality clothes into the second hand loop, which provides a valuable lifeline for low income people and students who need a vile, slapdash costume for a night of debauchery. If the piece is horribly out of date, you may be able to flog it as vintage on Ebay, Etsy or through a vintage shop.


Don't donate your clothing to companies/charities who will then send it overseas! This destroys the local economy and textile industries in the developing world and is an especially bad idea in times of crisis (say after a natural disaster) because the influx of clothing clogs the ports and prevents important and vital goods getting through. For more information, read up on Good Intentions Are Not Enough.


What do I mean by notions? Notions are bits and bobs that are stuck to the fabric of your piece- trims, buttons, elastic, boning, hooks and eyes, zips, lace edges etc. If you have a piece that's ugly, but has cool looking buttons, see if you can rescue them.


Rescuing fabric to use in projects can give you more of a connection the piece when it's finished and reduces the cost overall. If you make a quilt for someone that has a slice of their old favourite shirt in it, they'll have even more reason to treasure it. 


Obviously, the best thing you can do to reduce textile waste is to buy less cheap, crappy clothes in the first place. Stick to investment pieces that will wash and wear well and won't fall apart after you've loved them for 6 months. Try to buy more natural fibres as synthetic fibres rely on petroleum and more caustic dyes. Support British wool farmers and don't go overboard on the cotton- cotton diverts valuable water from food crops in already water stressed countries and uses an abundance of pesticides. Buy second hand- I have a give and take policy with shops like Oxfam, which adds up to double the giving for them as not only am I paying to take other people's clothes, I'm adding to their stock.


Whatever you do, don't just throw clothes away. It's wrong, and if I find out who you are, I'll follow you home and raid your wardrobe while you sleep.


Sweet dreams! x

Wednesday 13 April 2011

Round 1

Every year the same thing happens- I end up waging war with the garden. I don't mean waging war against nature, because I like nature. I'm cool with being around bugs and flowers and most weeds and birds and whatever. It's more a war against my parents' bizarre hoarding habits, and the horrible mutated nature we have here in the garden. We never used to have a problem with brambles at the bottom of the garden, because a huge bank of laurel trees sapped enough light and nutrients to keep them in check.


That all changed when my mum hacked down the laurels about 6 years ago. She has a habit of radically changing things in the garden and then never following it up. The brambles took over nearly immediately. It didn't matter what we did, how many we dug out, they just kept growing. My brother even hacked them all back and laid down plywood to no avail- they simply grew through the plywood. 
By last summer, the end of the garden was about 80% brambles.


I made a lot of changes to the garden last summer including hacking back many over hanging trees to get more light in, knocking down a derelict shed, and digging a new vegetable bed. But the most dramatic was the spray and slash job I did on the brambles, dousing them with herbicide and cutting them down to ground level after the systemic weed killer had worked. The idea of systemic herbicide is that is travels through the plant's systems and kills not only the foliage but the root too. I only use weedkiller on brambles. I don't like using it at all.


Here's why: it just doesn't work.


I took that picture today. Obviously it's a lot clearer than last summer (the wooden palettes were left by builders my mum hired to put in a patio), but those dots of green starting to spring up? They're brambles. The bastards are still there. I knew that if I left it even a week they'd be back to full coverage, so I sprayed them today. It smelt horrible and toxic.


The plan now is to wait a couple of days for the weedkiller to kill off the foliage so the plants don't have a chance to get growing, then get in there and dig up as much as I can. Then sow a half-assed lawn on top. Our lawnmower is some monster model from the 1990s with a turning circle to match our car and the soul of an ATV, the thing can handle anything you chuck at it, so a slightly bumpy lawn with the occasional bramble should be a doddle.


Also today I moved some bricks down the garden.


It was easier to avoid the urge to invent "death Jenga" when I saw the size of the spiders living in the pile.


I want to see if I can build a simple raku kiln out of the bricks. There's about 150 bricks there, and there is more than enough wood in the garden to power a low temperature firing. The plan would be to build the kiln using mud as cement and earth to reinforce the walls and then dismantle it when done.


There's lots of paving slabs that could work as kiln shelves. Hiding under one today, I found this:


It's a baby stag beetle :3


Cute, no?

Monday 11 April 2011

It's the most wonderful time of the year!

Screw Andy Williams, now is so much better than the run up to Christmas. The whole world is bursting out of it's collective front door, skipping around and shaking off winter. I can take a shower in a room with natural light listening to the birds singing instead of in a horrible little room that resembles some cross between a closet and a space coffin. Lambs are out in the fields (yeah, I don't live near any fields, but I can think about them springing about). Everyone is outside mowing their lawn and playing with their kids and being happy that the dark snowy days of winter have been blasted away for a bit.


This being England, it will probably rain up a monsoon all summer and we'll end up having a tropical Halloween again.


Never mind.


This year I am sprouting butternut squash and sweetcorn in the greenhouse.


I have never grown butternut squash before, but I've had no problem growing courgettes and I grew a pumpkin a couple of years ago which turned out beautifully. It's the same family, so I doubt it will behave much differently (we'll see!).
I haven't tried to grow sweetcorn since I first started growing veggies in the back garden back in 2005. Then I failed miserably. Hopefully this year I'll have more success.


Out on the deck I've got a tray of carrots and leeks ready to grow.


I know you're not really supposed to transplant carrots, but every year I sow them in the ground in rows and every year they get decimated by either slugs or the cat scratching over them. This year I am determined to grow some damn carrots! It's completely futile because we have heavy clay soil in the garden, but there's plenty of compost and even some building sand to bulk it out with, so I might be in with a carroty chance this year.
Leeks are a doddle. Every year except the first I've grown leeks, I've ended up with more than my family could handle. My mum isn't big on onions. I'm sure I can find some students who wouldn't mind some free vegetables.


Also sprouting on the deck are my sunflowers and some yellow rose pips I saved from some prunings my mum took in the garden.


The sunflower I picked to grow isn't the giant variety, it's supposed to stop around 180cm tall, which is exactly what I want (giant ones are overrated). I want to intercrop it with the sweetcorn to create a tall patch of corn and flowers. I'd like to try harvesting my own sunflower seeds to eat too, but most of them will probably just end up feeding the birds.
No idea whether the rose pips will even germinate.


Here are my vegetable plots, dug over, ready for slug nuking and composting:


The green clump in plot 1 is a patch of garlic I planted 2 years ago that's taken up residence. I haven't the heart to boot it out. Homegrown garlic is fabulously strong, but it's difficult to peel. Plot 3, the large plot on the left of the picture is a virgin plot this year, so it's full of roots, stones and other nasties. That's where the corn and sunflowers are going.


This part of the garden is my main focus, but I've got other patches for growing flowers to attract a whole eco system to the garden (except slugs. Fuck slugs).


There are horse chestnuts springing up all over the garden, thanks to the local population of squirrels.


I'm going to try and pot up and relocate as many as I can. There are loads of pointless grass verges in Slough that could do with a big strong tree to liven them up. Or I might advertise them in the paper or on Gumtree to try and shift them off to new homes. It's important to try and save as many horse chestnuts as possible- they're under attack from a European invader. Here's hoping I can find this one a good site to thrive in for 100 years.


I'm also hoping that it rains for at least one day this week, because I'm pretty sure "unseasonably good weather" is not an extenuating circumstance to get me out of doing my essay. Stupid education...

Saturday 9 April 2011

How to Clean a Deck (or how to waste the first two perfect sunny days of the year)

If I ever found out who made decks popular in the mid noughties and directly led to my mum wanting and installing one, I hope I can track them down and punch them in the face. Decks are nothing but hassle. Sure, it's a romantic notion to think of you, the matriarch of the house, sitting there on the back deck, rocking in a rocking chair with a shotgun on your lap and the cat at your feet, but that isn't what happens. What happens is you buy too much horrible hardwood furniture (which you neglect) and leave it in rotting piles on your pine deck (also neglected).


Last year after 6 months of patchy temporary employment, desperate for the last £100 I needed to get a flight out to see my then boyfriend in Seattle, I scrubbed that bastard deck on my hands and knees for a week. I ended up with a chest infection, and by the time I finished the awful thing, British Airways had put the price up by another £1oo.


This year, I was determined to find another, better, way of doing things. And I did, hooray!


If you haven't cleaned your deck since last year, there's a fair chance it currently looks like this:


A gross nasty build-up of algae, mud from peoples shoes, bird shit, my brother's cigarette ash, and the occasional beer spillage.


Well, the good news is you can get it off, although it does take some effort. If you want to get it back to it's original glowing state, it's going to take a lot of elbow grease and some sanding. I didn't want to get it good as new, I just wanted to protect the damn thing for another year.
You will need:

  • a stiff broom
  • a sponge mop (the cheapest one you can find is fine)
  • 2 buckets, one big enough to fit the broom in and the other big enough to fit the mop in
  • deck cleaner. Cuprinol and Ronseal both sell it at hardware stores. I got a bottle of the Cuprinol Decking Cleaner and Reviver from Wilkinsons for £13.99
  • rag/sponge for final clean up
  • Decking varnish/oil/whatever you want to finish the deck with
  • a pantbrush to apply the above
First you need to give the deck a really good brush down with the broom to remove as much lose dirt as you can. If it's been dry for a while, try hoovering it off (I tried this, but the dried leaves just clogged up the hoover). The brushing should also dislodge any thick moss or bird crap.

Now fill your broom bucket (bucket 1) with about 2 inches of deck cleaner. I also add a small squirt of bleach, dish washing liquid, and wood floor cleaner. Dilute it 50/50 with warm water. Fill your mop bucket (bucker 2) with warm water. I used warm water because I work barefoot and it's nicer splashing on your feet.


Take your broom, dip it in bucket 1 and start scrubbing away at the deck, working a manageable area a plank at a time. I worked about 1.5 metres down the deck, 3 planks at a time. Keep dipping your broom in the bucket, be liberal with the detergent and just keep scrubbing. Depending on how dirty your deck is, you'll start to notice nasty dark sludge coming up off the wood. Just keep working, scrubbing up and down each plank and then working in longer strokes in the direction you're cleaning.


It's hard to see because it's so sunny, but there was lots of sludge coming up.

This is where the mop comes in. Without the mop, the sludge would just sit on the surface of the deck. Take your mop and run it along the planks in the direction you're cleaning. Clean it off in bucket 2, and run it over the area again, absorbing as much sludge as you can.

And that's it, just keep going. I changed my bucket 2 water once each 1.5m row, and my bucket 1 detergent about every two rows. When you get halfway, start working from the other end and meet in the middle. There will be a sludge pile here, so take your rag or sponge and clean up the last of the sludge.

Leave your deck to dry.

Looking better!

Finally, you need to apply a finish to your deck, because as soon as you stopped cleaning it, leaves started falling on it, dust started blowing on it, and birds started shitting on it, so you need to protect it. I used a clear product called Deck Protect and Revive or something similar. There's lots of different products, but some of them stain so if you want a more natural finish, go for a clear one. If your deck is still looking nasty, you may need to sand it to get off the patina. Sucks to be you!

I liberally applied my decking protector with a big paintbrush. It took about an hour, and I didn't read the safety precautions, so if I die tomorrow, blame it on the fungicide. The finish was really good- it looked buttery and revived without looking overworked or varnished. Here's a contrast shot:


And that's how you clean a deck without getting on your hands and knees and developing a chest infection from working in freezing sleet.


Thursday 7 April 2011

Spring Carrot Cake

Last Sunday was Mothering Sunday in the UK and, being a broke student, I didn't really have anything to give my mum except a handmade pot (one of the first things I threw on the wheel) with a dying orchid in it. Not wanting to look mean, I made her a carrot cake.


This recipe is adapted from the carrot cake in Delia Smith's Book of Cakes, but I feel it's different enough to not get in trouble for posting.
This cake is moist, with a texture a little like a muffin. The carrots lend a good amount of sweetness without ever bordering on sickly, and you can dress it up multiple ways (see topping ideas below). The mixture would also work as cupcakes, pour into cake cases and bake for 17-20 minutes instead.


Ingredients    
  • 75g soft dark brown sugar (muskavado)
  • 100g light brown sugar (demerara/unrefined cane sugar)
  • 2 large eggs
  • 150ml sunflower or vegetable oil
  • 200g grated carrots (this is about 3 medium sized carrots)
  • 30g desiccated coconut
  • 200g self-raising flour


Method
  • Preheat the oven to 180°c.
  • Combine the sugars, eggs and oil in a mixing bowl and beat to a smooth mixture, making sure to eliminate any lumps in the dark brown sugar.
  • Add the coconut and carrot then gently fold in the flour.
  • Line a 7 inch round cake tin with parchment paper, pour in the mixture and bake for 30-35 minutes. The cake will have risen and should be lightly browned on top. It will also spring back when pressed and should leave a skewer clean.
  • Leave to cool on a cooling rack and remove parchment paper from the bottom of the cake (it doesn't matter if you do this before or after cooling, but be careful you don't damage the bottom of the cake)


Topping ideas
I wanted to create a light topping that wasn't too messy, so I combined a spoonful of icing sugar with a pinch each of cinnamon, nutmeg and ginger and then used a small sieve to dust the top of the cake.
You could instead choose a cream cheese topping for a mature taste, use spiced buttercream (mix butter, icing sugar, and a small amount of mixed spice together), or go with a fruit syrup soak. To make a syrup soak combine the juice of one orange with a dash of lemon juice and 75g of sugar. When you take the cake out of the oven, keep it in its tin and (carefully!) stab it all over with a skewer, then pour over the juice mixture and leave the cake to cool. As it cools it will absorb the juice and become a gooey sticky cake that's good served with ice cream.

Happy baking!

x

Wednesday 6 April 2011

Admitting you have a problem is the first step

Well, I have a problem. It's more of a habit really. I have never been good at keeping my bedroom in a good state. It's somehow got worse since I moved into my student halls and only see my bedroom once a month or so. It seems every time I come and stay, I rush in, dump stuff everywhere, grab other stuff, and leave. The result of that is this:


I will point out here that it's not dirty. It's just messy. There aren't dirty plates or banana skins lurking around, it's all just clutter that needs culling and hasn't been removed for some reason or the other. I am a clutter junkie.
Anyway, at the end of my bed, buried under layers of other crap, is a wooden chest.

It's there, I promise. Ooh, rollerblades!

This is where I keep my fabric scraps; bits left over from planned projects, offcuts from shops that are odd sizes, old hacked up clothes and any other textile pieces I've come across that aren't nice enough to live in my black box with my fresh fabric. This chest is overflowing, bits and pieces are literally leaking out of the handle holes.
Having got to the point where I couldn't remember what was really in it, it needed clearing out. I'm an art student (Ceramic Design BA at Central St Martins, woo!) and right now I'm broke and on Easter break for 3 weeks. Broke on break and with no job lined up means I need to start using up some of the materials I already have instead of rushing out to buy more all the time. Who knew what treasure this chest held?

Treasure isn't the word I'd pick, but hey.

I was shocked when this lot came out. I had no idea so much stuff was crammed in there. It covered my entire bed and occupied a space about twice the size of me. Here's a closer shot of the bits and bobs:

I started digging with the vague hope of sorting by colour and culling based on size. Any thin strips would go, as would any with stains or tears. Any intact clothing would get the seams cut down to reduce bulk. The pile was ridiculous. It smelt musty and neglected. Considering I got this chest when I was about 16, some of the pieces had been there more than 5 years. There were more than one whole pair of jeans, and a hideous dress I wore on my gap summer (it smelt like it hadn't been washed since it's tropical debut in Hawaii).

It took all day, but eventually the mass became neat colour sorted piles. I was surprised, there were some good sized pieces that could easily become patchwork and enough denim to make a jeans quilt.

'scuse the blur, the lighting in my room is awful

I was also surprised by the absence of green scraps. Green in my favourite colour. I've obviously not been making enough stuff for me. I had enough tiny scraps to fill the Monsoon bag on the floor as well as a pile of stuff that just did not belong in the chest, including a horrible tote bag made of a tea-towel and a giant cushion cover.

I bagged it all up and chucked it back in the chest, to iron another day. It felt successful, even if all I'd really done was discover I like pink florals more than I'm letting on.

ooh look, an orb!

And well, that's it for this first post. That's what I did. In later projects some of these fabrics will probably reappear, but until then, they are shut away where they belong, smelling slighting less like a very old gym kit.